Chapter 16
Going Beyond the FrontPage Editor
CONTENTS
There will be times when you need to work with existing content
or use editors besides the FrontPage Editor. You might want to
use a text editor to edit text or ASCII files that are located
in your web. You might want to touch up a graphic. You might even
want to use another Web page editor to incorporate features that
the FrontPage Editor does not support. You can access other editors
easily through FrontPage by configuring them with the Tools |
Configure Editors command.
FrontPage enables you to import any type of file into your web.
Besides HTML documents, you can open or insert two types of files,
which are converted to web pages for you. They are
- Text files
- Rich text format (RTF) files
You can open existing HTML documents from your local or network
hard drive or from the World Wide Web. You use the FrontPage Editor
in both cases. The steps are
- In the FrontPage Editor, select File | Open File. The Open
dialog box, shown in Figure 16.1, appears.
Figure 16.1:Use the Open dialog box to open existing
HTML, text, or RTF documents from your local or network hard drive.
- Use the Look In field to locate the drive and directory where
the HTML file appears.
- From the Files of type drop-down menu, choose HTML Files (*.htm,
*.html).
- Select the file, and click Open. FrontPage opens the file
in a new window.
You can insert an HTML file into another web page in the FrontPage
Editor. The file is inserted at the current insertion point. The
steps are
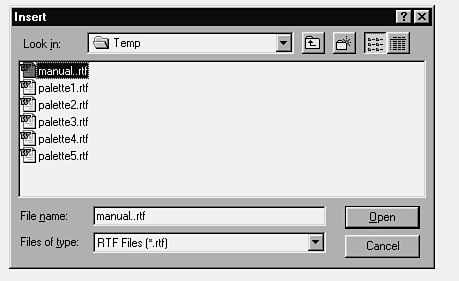
- In the FrontPage Editor, select Insert | File. The Insert
dialog box, shown in Figure 16.2, appears.
Figure 16.2:Use the Insert dialog box to insert an
HTML document into another web page.
- Use the Look In field to locate the drive and directory where
the HTML file appears.
- From the Files of type drop-down menu, choose HTML Files (*.htm,
*.html).
- Select the file, and click Open. FrontPage inserts the file
at the current insertion point.
You also can open a Web page from the World Wide Web. In this
case, you use the File | Open Location command. The steps are
- Establish a connection to the Internet.
- In the FrontPage Editor, select File | Open Location. The
Open Location dialog box, shown in Figure 16.3, appears.
Figure 16.3:Use the Open Location dialog box to open
a page from the World Wide Web.
- Enter the URL of the page to which you want to navigate in
the Location (URL) field.
- Click OK. You navigate to the page, and it opens in the FrontPage
Editor.
- Select File | Save As to save the page to your current web.
If the pages that you open contain any HTML code that FrontPage
does not support, small yellow rectangles with question marks
in them appear, as in Figure 16.4. These marks look like gibberish
on your page, but they serve a good purpose. They are HTML markup
bots. If you double-click them, you can view or edit the HTML
code that they contain.
Figure 16.4:Code that the FrontPage Editor does not
recognize is inserted into an HTML markup bot.
When you open a text file in the FrontPage Editor, it is converted
to a new HTML document that can be added to the current web.
To open a text file from the FrontPage Editor:
- In the FrontPage Editor, choose File | Open File. The Open
dialog box appears.
- Use the Look In field to locate the drive and directory where
the text file appears.
- From the Files of type drop-down menu, choose Text Files (*.txt).
- Select the file, and click Open. The Convert Text dialog box,
shown in Figure 16.5, appears.
Figure 16.5:Use the Convert Text dialog box to choose
how you want to convert a text file.
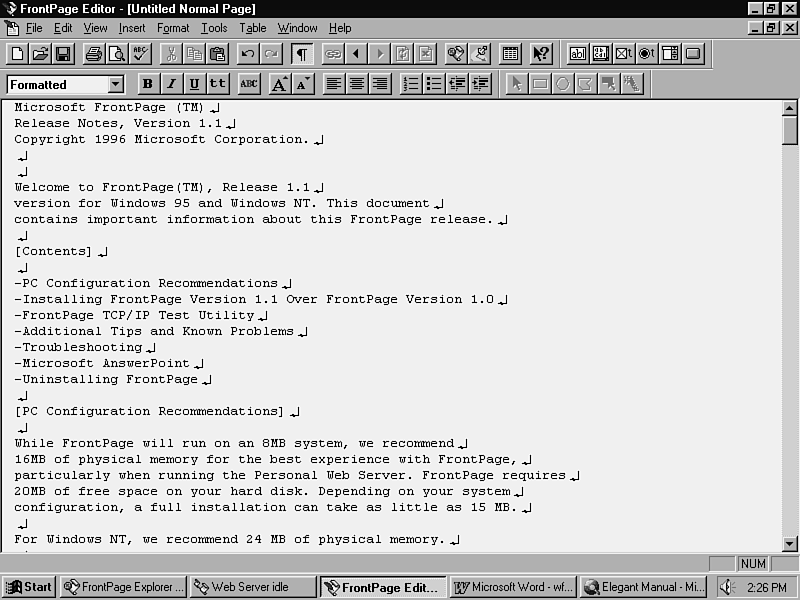
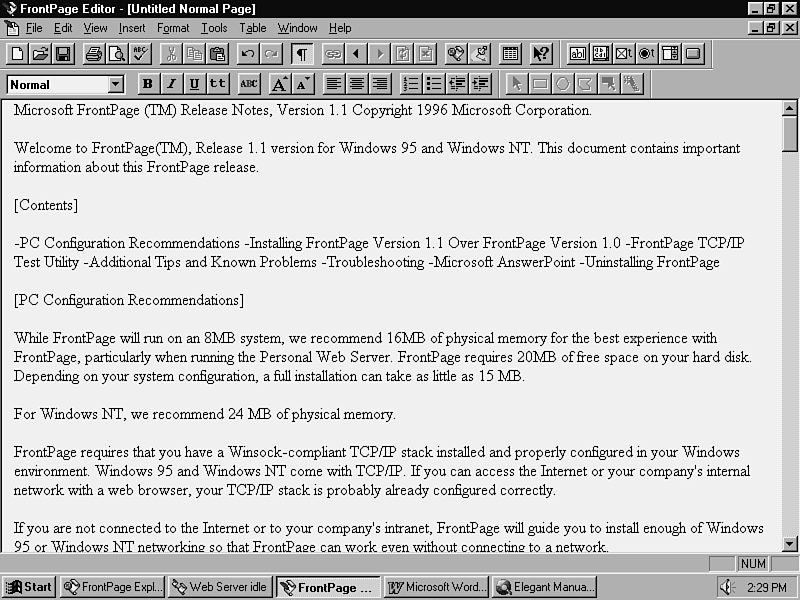
- Choose one of the following conversion options, and click
OK. In Figures 16.6 through 16.9, the fpreadme.txt file,
located in the Microsoft FrontPage directory, is imported.
Figure 16.6:When you choose one formatted paragraph,
each line ends with a line break. The entire page is one continuous
formatted paragraph.
One formatted paragraph. All the text is converted to a
single paragraph of formatted text with line breaks. (See Figure
16.6.)
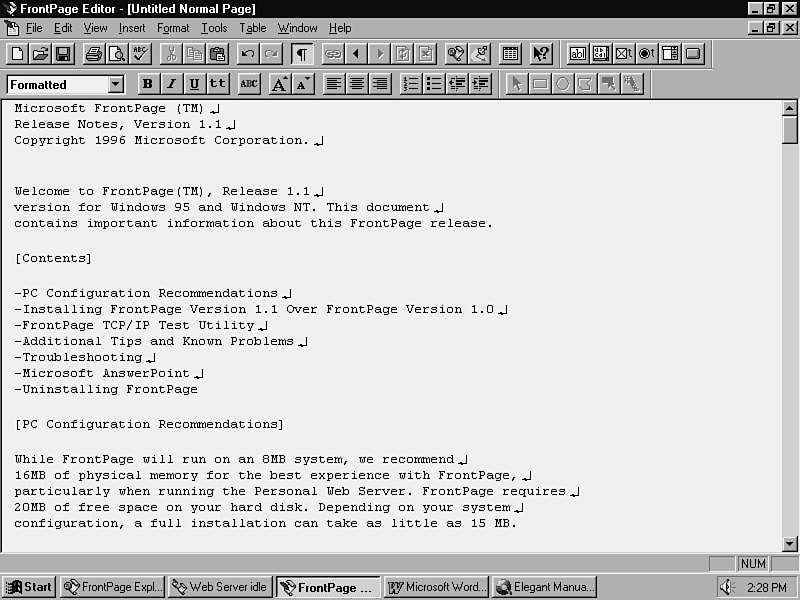
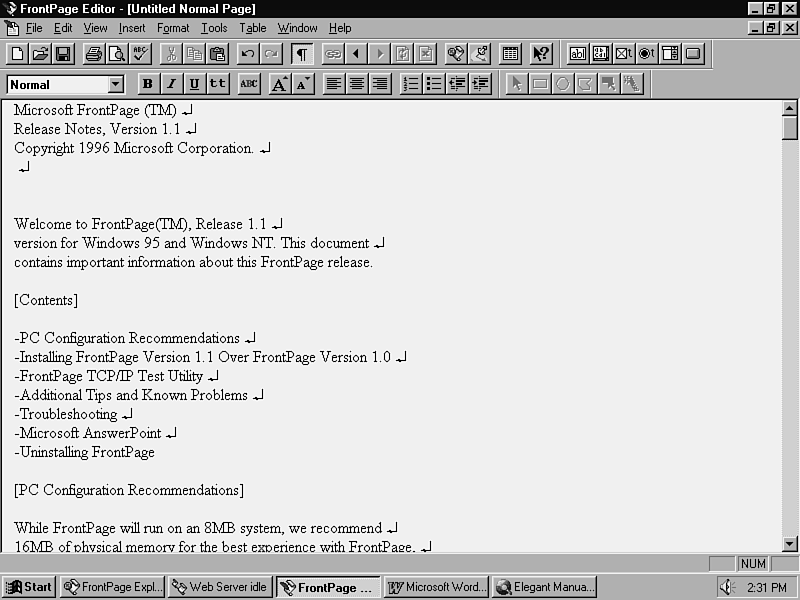
Formatted Paragraphs. Each paragraph in the text file is
converted to formatted text. (See Figure 16.7.)
Figure 16.7:When you choose formatted paragraphs, each
paragraph begins as a new formatted paragraph. The lines within
each paragraph use line breaks.
Normal Paragraphs. Each paragraph in the file is converted
to normal text. (See Figure 16.8.)
Figure 16.8:When you choose normal paragraphs, each
paragraph is formatted as a normal paragraph. No line breaks are
included.
Normal Paragraphs with Line Breaks. Each paragraph in the
text file is converted to normal text with line breaks. (See Figure
16.9.)
Figure 16.9:When you choose normal paragraphs with
line breaks, each paragraph is formatted as a normal paragraph.
Line breaks retain the original formatting of the text document.
- Use the File | Save command to save the page to the current
web.
When you insert a text file, FrontPage converts the file and inserts
it at the insertion point in the current page. The steps are
- In the FrontPage Editor, select Insert | File. The Insert
dialog box appears.
- Use the Look In field to locate the drive and directory where
the text file appears.
- From the Files of type drop-down menu, choose Text Files (*.txt).
- Select the file, and click Open. The Convert Text dialog box
appears.
- Choose a conversion option and click OK. The text file is
inserted at the insertion point.
You can save any word processing document as an RTF file and open
or insert its content into a page that can be saved in your current
web. The steps are
- From the FrontPage Editor, select File | Open File. The Open
dialog box appears.
- From the Files of type drop-down menu, choose Rich Text Format
(*.rtf).
- Locate the drive and directory where the RTF file is located.
- Highlight the page that you want to open, and click Open.
FrontPage converts the RTF document to HTML format and creates
a new page for you. Any graphics that are contained in the RTF
document are converted to GIF or JPG format, as appropriate.
- Save the page to your current web with the File | Save command.
Assign it a title and a URL.
| TIP |
A graphic might appear larger or smaller in a FrontPage web page than it does in the original RTF file. If this is the case, open it in a graphics editor, and check what dots per inch setting it was saved at. Graphics convert best if their dpi setting is
72.
|
You also can insert an RTF document into any web page. The steps
are
- Open or create a new web page in the FrontPage Editor, using
the Normal page template.
- Position the insertion point where you want to insert the
RTF file.
- Select Insert | File. The Insert dialog box appears.
- From the Files of type drop-down menu, choose Rich Text Format
(*.rtf).
- Locate the drive and directory where the RTF file is located.
- Highlight the page that you want to open and click Open. FrontPage
converts the RTF document to HTML format and inserts it at your
insertion point. Any graphics that are contained in the RTF document
are converted to GIF or JPG format, as appropriate.
- Save the page to your current web with the File | Save command.
Assign it a title and a URL.
You will come across other types of files as you develop your
webs. If you include or add links to multimedia files-such as
sounds, animations, or VRML worlds-you can configure FrontPage
to start their associated editors by clicking the file in your
web that you need to edit.
To associate a file type with another editor, use the Tools |
Configure Editors command in the FrontPage Explorer. After an
editor is configured, you can open any file with the extension
that you configured. The associated editor is invoked automatically.
To configure an editor and file type:
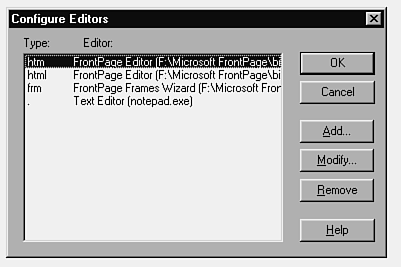
- In the FrontPage Explorer, select Tools | Configure Editors.
The Configure Editors dialog box, shown in Figure 16.10, appears.
Figure 16.10:The Configure Editors dialog box enables
you to associate an editor with a file extension.
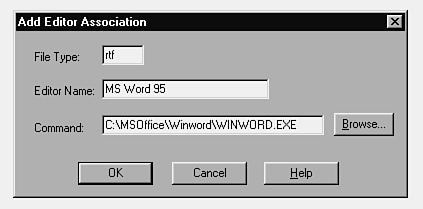
- Click the Add button. The Add Editor Association dialog box
appears. (See Figure 16.11.)
Figure 16.11:You associate an editor with a file extension
in the Add Editor Association dialog box.
- In the File Type field, specify a file extension for the file
type. You do not need to enter a period before the extension.
To indicate files that have no extensions, use a period by itself.
| NOTE |
FrontPage enables you to configure only one editor per extension. If you try to add an editor association for a file extension that is already configured, you get an error message.
|
- In the Editor Name field, enter the name of the editor.
- In the Command field, enter the full path to the executable
file for the editor, or use the Browse button to choose the executable
file from a drive and directory on your hard drive.
- Click OK. The new editor appears in the Configure Editors
dialog box.
After an editor is configured, you can open it from the FrontPage
Explorer. In the FrontPage Explorer's Link View or Summary View,
just double-click the file that you want to edit. Its associated
editor is opened.
| NOTE |
When you open a file with another editor, FrontPage places a copy of it in the \Microsoft FrontPage\temp directory. Some editors will not open the file automatically, so you might have to open it from within the configured editor. You should open
the copy of the file in the temporary directory, instead of the original one in your current web. After you save the file, it appears in the FrontPage Explorer's Import List in the Import File to Web dialog box. Use the File | Import command to import the
new version into your web.
|
If you want to use another editor to edit a specific type of file,
it is simple to edit the association. The steps are
- In the FrontPage Explorer, select Tools | Configure Editors.
The Configure Editors dialog box appears.
- Select the editor configuration that you want to change.
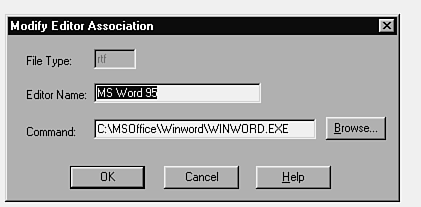
- Click the Modify button. The Modify Editor Association dialog
box appears. (See Figure 16.12.)
Figure 16.12:You change the associated editor for a
file type in the Modify Editor Association dialog box.
- In the Editor Name field, enter the name of the new editor.
- In the Command field, enter the full path to the executable
file for the editor, or use the Browse button to choose the executable
file from a drive and directory on your hard drive.
- Click OK. The revised editor configuration appears in the
Configure Editors list.
If you find that you no longer work with files of a certain type,
you can remove their editor associations from FrontPage. The steps
are
- In the FrontPage Explorer, select Tools | Configure Editors.
The Configure Editors dialog box appears.
- Select the editor configuration that you want to remove.
| NOTE |
You cannot remove the default editor and file type associations supplied with FrontPage.
|
- Click the Remove button. To confirm the removal, click OK.
To undo the removal, click Cancel.
FrontPage enables you to assign only one editor for a specific
file type. What if you want to use another HTML editor in conjunction
with the FrontPage Editor? This is what you can do:
- Configure the editor association for the HTM or HTML extension-whichever
you use more frequently-to the FrontPage Editor. This enables
you to use the FrontPage Editor to design the bulk of your page
while you take advantage of the bots and other enhancements in
the program.
- Configure a second editor to use the other extension. Now
you have two different HTML editors in your editor configuration.
To open the HTML document in the secondary editor:
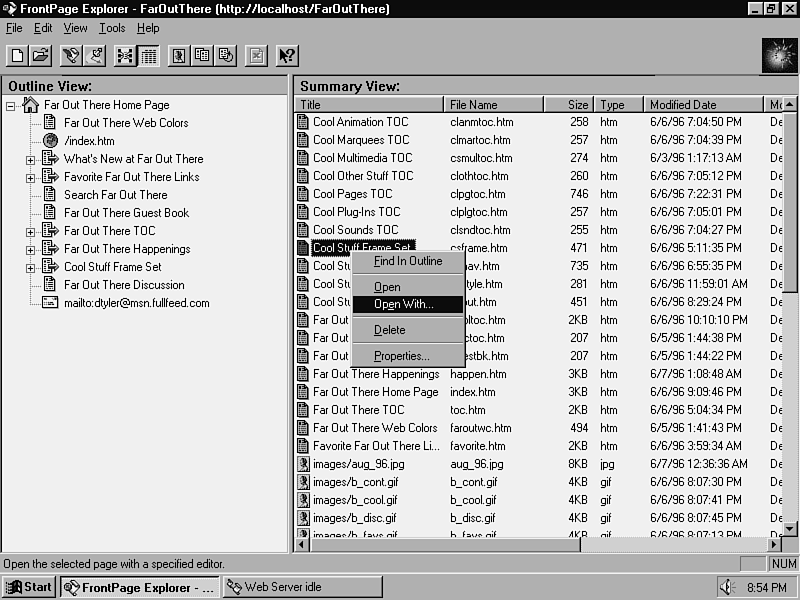
- From any view in the FrontPage Explorer, right-click the Web
page that you want to open. A pop-up menu appears, as in Figure
16.13.
Figure 16.13:You can open a file with any configured
editor by using the Open With command in the pop-up menu.
- From the pop-up menu, choose Open With. The Open With Editor
dialog box appears.
- Select the secondary HTML editor and click OK. The editor
opens, and you can edit the file.
Keep in mind these points:
- You lose the capability to use bots in your pages when you
work with another HTML editor.
- If the page that you are opening in another editor was originally
designed in the FrontPage Editor and contains bots, the commands
that reference them are likely to be stripped out in the other
editor. When you import back into your FrontPage web, you must
add the bots again.
- Many HTML editors check code for compliance before the web
page opens in the editor. Your FrontPage web pages might contain
code that another HTML editor will not accept.
The solution to these problems is to create as much as you can
in the FrontPage Editor. Use the HTML markup bot discussed in
Chapter 21 to add additional HTML code.
You can configure a text editor to work with any extension for
which you normally use a text, or ASCII, editor. If you use Windows
95, configure these files to use Notepad or WordPad. With WordPad,
the files retain their formatting and indentation much better.
If you want to include word processing documents in your web,
you can save them in rich text format-that is, with an RTF extension.
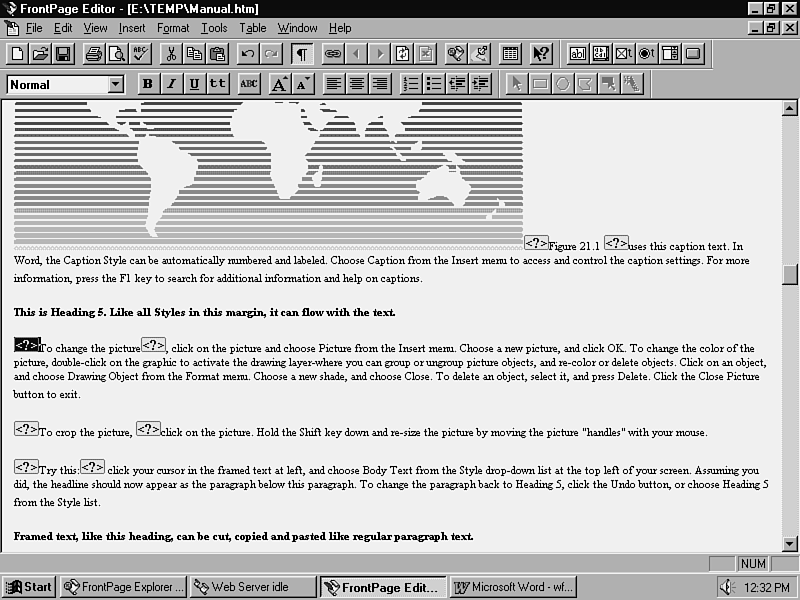
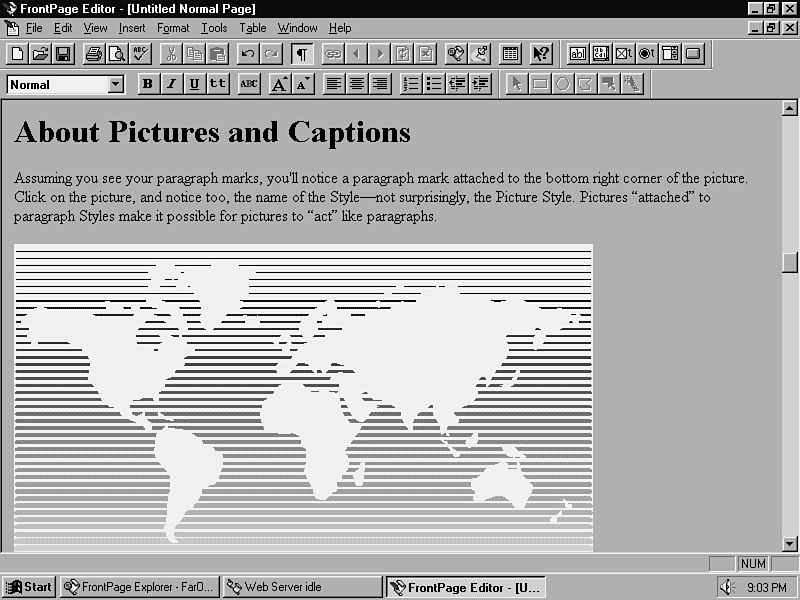
Figure 16.14 shows a Microsoft Word document in RTF format.
Figure 16.14:This Microsoft Word document has been
saved in RTF format.
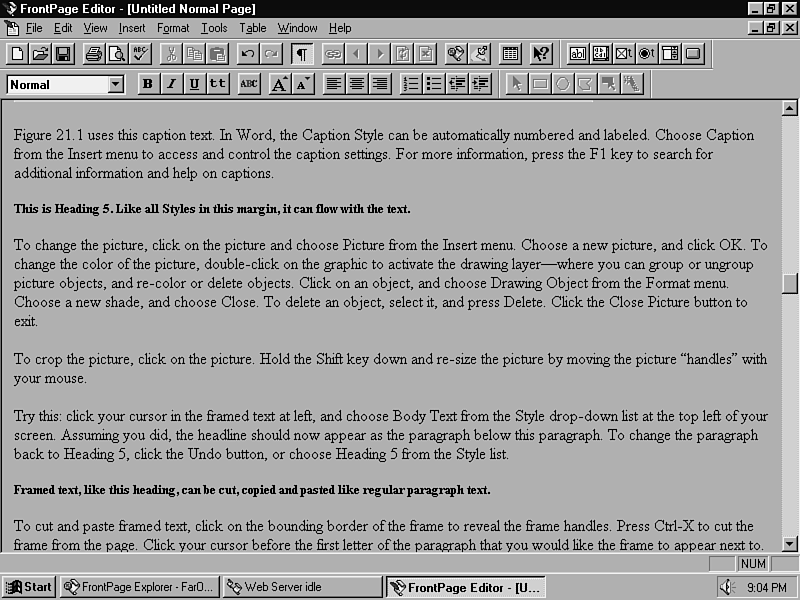
Figures 16.15 and 16.16 show the RTF document as it appears in
the FrontPage Editor. There are some minor differences in formatting:
Figure 16.15:The upper portion of the RTF file converted
perfectly, with the exception of the font style of the heading.
Figure 16.16:The lower portion of the RTF file is formatted
slightly differently.
- In Figure 16.14, the Arial font is used for the headings.
In the FrontPage Editor's HTML version in Figures 16.15 and 16.16,
the headings are formatted in FrontPage's default heading style,
which uses the Times Roman font.
- In Figure 16.14, the area beneath the picture caption is formatted
into four individual lines that are aligned with the left side
of the page. In Figure 16.16, the same text is arranged in a single
line.
There is a way around these differences. If you use Microsoft
Office or Microsoft Word 95, you have two alternatives. If you
use another word processor, check whether similar options are
available.
- Import the original Word document-doc extension-into your
web with the File | Import command. Provide a link on another
web page that enables users to download or view it. To view the
document in its original Word format, users need the Word Viewer.
- You can provide a link on your page for users to download
the current version of the Word Viewer. The URL is
http://www.microsoft.com/msword/internet/viewer/default.htm
- Use Internet Assistant for Word to save the Word document
in htm format. (Save a Word document in its native doc format,
and then save a copy of it in HTM format after you have revised
it.) This adds font formatting commands to the web page, which
Internet Assistant for Word includes in its HTML code. When FrontPage
imports this HTML command, it places the font formatting commands
in HTML markup bots.
- You can download the current version of Internet Assistant
for Word from
http://www.microsoft.com/msword/internet/ia/default.htm
- After you save the HTML document from Internet Assistant,
use the File | Open command to open it in the FrontPage Editor.
Save the page to your web with the File | Save As command. (If
you use the File | Save command, it saves the file back to its
original location.) When you open the page in Microsoft Internet
Explorer, you will see the fonts used in the original document,
providing they exist on your system. For users to see the same
fonts, the fonts must exist on their system. Otherwise, the default
font is used.
| NOTE |
You might need to add size attributes to the fonts. You learn how to do this in Chapter 21
|
FrontPage currently does not provide direct support for spreadsheet
or database files. When you work with spreadsheet or database
software, your options are
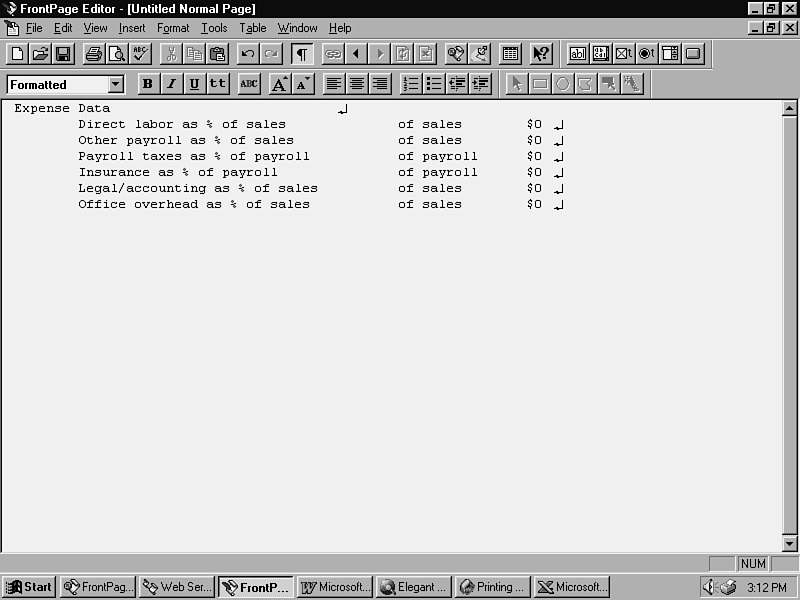
- Open the spreadsheet or database program, and select the cells
that you want to insert into your web page. Copy them to the clipboard.
Then open or create a page in the FrontPage Editor. Position the
insertion point where you want to insert the data, and format
the line as a formatted paragraph. Paste the data to the web page.
(See Figure 16.17.)
Figure 16.17: Cut and paste data from your spreadsheet or database files into a formatted paragraph on your web page.
- Save the spreadsheet or database data as a tab-delimited text
file, and insert it into your FrontPage web page. The data appears
as formatted text. (See Figure 16.17.)
If you use Microsoft Office or Microsoft Excel for Windows 95,
Internet Assistant for Excel 95 can enhance the use of Excel files
in your web. It converts Excel spreadsheets into HTML format and
places the cell data in tables. This Excel add-on is provided
in Excel (XLA) format. You can download this utility from
http://www.microsoft.com/msexcel/internet/ia/default.htm
You also can import an Excel spreadsheet into your web and provide
a link to it on another page. Likewise, provide a link to the
following URL so that users can download the Excel Viewer:
http://www.microsoft.com/msexcel/internet/viewer/default.htm
An Internet Assistant for Microsoft Access for Windows 95 is also
available. This free utility allows you to publish native HTML
documents from your Access or ODBC-compliant databases. You can
download it from
http://www.microsoft.com/msaccess/internet/ia/default.htm
If you use Microsoft Office or Microsoft PowerPoint 95, Internet
Assistant for PowerPoint 95 can enhance the use of PowerPoint
presentations in your web. It converts PowerPoint presentations
into a series of consecutively numbered HTML files and provides
navigation between them. The presentation screens are converted
to graphics that are placed on each page. You can download this
utility from
http://www.microsoft.com/mspowerpoint/internet/ia/default.htm
You also can import a PowerPoint presentation into your web and
provide a link to it on another web page. Likewise, you can provide
a link to the following URL so that users can download the PowerPoint
Viewer:
http://www.microsoft.com/mspowerpoint/internet/viewer/default.htm
If your PowerPoint presentation includes animation, check out
what is available in the PowerPoint Animation Player for ActiveX.
Internet Explorer 3.0, which is currently available in beta version
from Microsoft's site, provides built-in ActiveX support. You
can download the PowerPoint Animation Player for ActiveX from
http://www.microsoft.com/mspowerpoint/internet/player/default.htm
You can link to multimedia files in your web. To play the files,
however, users must have a helper associated with the file type.
To create links to multimedia files:
- From the FrontPage Explorer, select File | Import. The Import
File to Web dialog box appears.
- Click the Add File button. The Add File to Import List dialog
box appears.
- Choose All Files (*.*) from the Files of type drop-down
menu. Then use the Look in box to locate the drive and directory
in which your files appear.
- Select the files you want to import, and click Open to add
the multimedia files to the import list. You return to the Import
File to Web dialog box.
- Highlight the file or files to import, and click the Import
Now button. The files are imported into your web one by one.
- Close the Import File to Web dialog box by clicking the Close
button.
- Create links to the multimedia files on a page with the Edit
| Link command.
To play the multimedia files, make sure that your browser has
a helper application associated with the file type. You can run
the files from the FrontPage Editor by using the Tools | Follow
Link command.
FrontPage works with a wide variety of file formats. You can import
just about any type of file into your web, as well as recommend
helper applications or viewers to visitors to your site. You can
open these files by configuring editors in the FrontPage Explorer.
You can open and insert text or rich text format files in your
web documents directly, and you can save them in standard HTML
format to your web.
In this chapter, you learned how to work with other types of files.
You learned how to configure FrontPage to open an editor associated
with a specific file type by clicking on the file that you want
to edit. You also learned about using other Microsoft Office documents
in your web.
In the next chapter, you continue your web project by working
on the techniques that you learned in this section. You create
new content for your web and rearrange some of what you have already
worked on. The following chapters provide information that relates
to this chapter:
- Refer to Chapter 9 "Composing and Editing Page Content,"
to learn about adding more formatting to the text or rich text
format files that you import into your web.
- See Chapter 21, "Using Your Own HTML Code," to learn
more about the HTML markup bot.
|
Q:
|
I used an editor to change a graphics file, but the change does not show up in my web. Why?
|
|
A:
|
Check whether the file is still in your import list. Choose the File | Import command from the FrontPage Explorer. The file might be waiting to be imported into your web again. After you import the new version, refresh the page in the FrontPage Editor or
in your web browser. Then you will see the changes.
|
|
Q:
|
I made my graphics smaller and saved them to my web. When I loaded the page that had those graphics in my Web browser, the images looked odd and took up the same amount of space as before. Did I do something wrong?
|
|
A:
|
If you resize your graphics and do not update the pages on which they are contained, the browser stretches to fit them in the area that they used to contain. The dimensions are saved in the HTML code, which is written when you save the page to your web.
Open the pages that contain the graphics, and save them again. Pay particular attention to graphics that you include on other pages with Include bots, such as navigation bars.
|
|
Q:
|
I used Internet Assistant for Word to create an HTML document. I imported it into FrontPage, and several markup bot symbols appeared. When I look at the web page in Internet Explorer, all the fonts are sized differently and do not look the same as in
the original document. How can I fix that?
|
|
A:
|
For the most part, the HTML documents translate fairly well. As for the font size, though, it is more confusing. Word processors handle font formatting differently than a web page does. In some cases, you must add the size attribute to that HTML markup bot
tag to specify how large the font is. You learn how to do this in Chapter 21.
|


